How to Plan a Low-Maintenance Outdoor Living Space
Key Takeaways
- Plan around how the space will actually be used.
- Address grading and drainage before installing decorative features.
- Choose surfaces and plants for durability, not just first impressions.
- Use simple zones to reduce edges, clutter, and cleaning time.
- Include shade, lighting, storage, and access in the original plan.
- Build in phases when a full renovation is not practical.
Creating an outdoor living space should make your home more enjoyable, not add endless chores to your weekly routine. With thoughtful planning, you can design a space that looks attractive year-round while requiring less watering, pruning, cleaning, and upkeep. Choosing durable materials, practical layouts, and plants suited to local conditions can help reduce maintenance without sacrificing comfort or style.
A successful backyard design focuses on how you want to use the space and how much time you can realistically spend maintaining it. Whether you envision a relaxing patio, an outdoor dining area, or a cozy gathering spot, careful planning can create an inviting landscape that stays functional and beautiful with minimal effort. This guide explores practical strategies for building an outdoor living space that’s easy to enjoy for years to come.
1. Define the Purpose of the Space
Start with the activities that matter most. A patio for quiet coffee, a dining area used several nights each week, and a gathering place for large family events all require different layouts. Ask how many people typically use the yard, whether cooking or play areas are needed, how close seating should be to the house, and what level of weekly care feels acceptable.
For example, a family that regularly eats outside may prioritize a shaded table, easy-to-sweep flooring, and storage for cushions. A household seeking a calm retreat may benefit more from privacy planting, comfortable chairs, and gentle evening lighting.
2. Assess the Yard Before Planning
Observe the property before selecting pavers, furniture, or plants. Note where sun and shade fall during the day, where rainwater collects, where slopes erode, and where tree roots may affect construction. Identify utility lines, outdoor spigots, electrical access points, existing views to keep, and sightlines that need screening.
Also, confirm local permit requirements, community rules, and utility-location procedures before building decks, retaining walls, pools, covered structures, outdoor kitchens, or new lighting. Correcting site problems before construction is usually far easier than correcting them after a patio or planting bed is finished.
3. Choose a Layout That Limits Upkeep
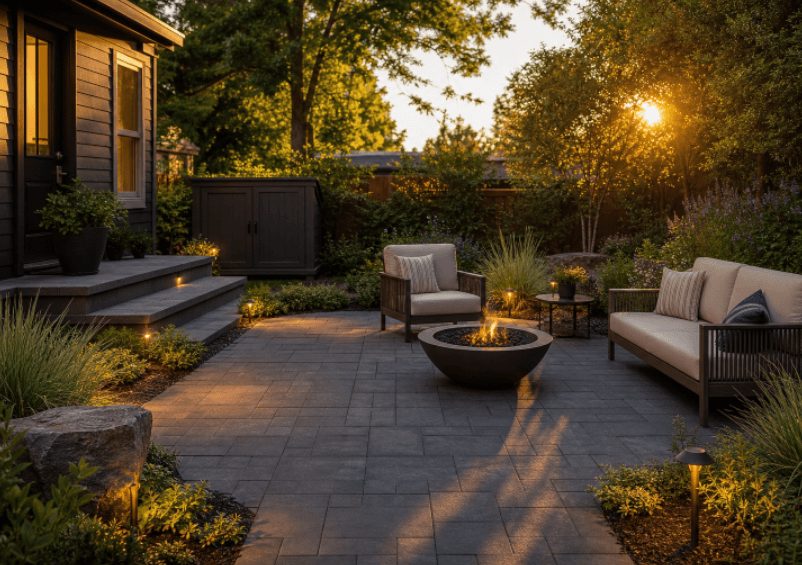
A clear layout reduces maintenance by limiting awkward corners, narrow paths, excessive edging, and hard-to-reach planting pockets. Divide the space into a few connected zones: an arrival area with safe walkways, a gathering area for dining or seating, a service area for cooking and tools, a green area for plants or lawn, and a quiet area for reading or relaxing.
See also: Customised Workwear – Empowering Businesses Professional Branding
Keep paths wide enough for normal traffic and simple enough to sweep. Leave access to gates, drains, hose connections, electrical controls, and service panels. If furniture blocks a route or must be moved every time the yard needs attention, the layout needs adjustment.
4. Select Durable Outdoor Materials
Compare materials by cleaning needs, repair options, local climate performance, traction, and long-term cost. Concrete and concrete pavers are practical for many patios. Natural stone can provide a long service life when properly installed. Composite decking often reduces the need for staining and sealing, while wood can offer warmth but usually requires more regular care.
Porcelain tile, gravel, and other loose-fill surfaces can work well in the right setting, but each has trade-offs. Loose material may migrate into beds, while tile and stone require a stable base and careful drainage. Fewer surface types generally create a calmer design and a simpler cleaning routine.
5. Plan Plants for Local Conditions
Choose plants for the actual conditions, including sunlight, soil, moisture, wind, mature size, and regional weather. Native or regionally adapted options can be useful choices when they match the site, and the benefits of native plants can extend beyond appearance to support resilient local landscapes.
Use disease-resistant shrubs, slow-growing trees near structures, and ground covers where turf struggles. Most importantly, space plants for their mature dimensions rather than their size at purchase. Crowded beds demand more pruning, trap moisture, and can make routine weeding more difficult.
6. Manage Water With Better Irrigation and Drainage
Water management belongs near the beginning of the project, not at the end. Grade hard surfaces away from the home, direct runoff to suitable areas, and resolve low spots before installing patios or planting. Where conditions allow, permeable materials can help manage runoff while creating usable walking surfaces.
For planting beds, drip irrigation, mulch, rain sensors, and weather-based controllers can reduce waste and simplify care.
7. Add Shade, Lighting, and Storage
Comfort features make the yard usable longer without adding major maintenance. Shade may come from existing trees, umbrellas, pergolas, covered areas, or adjustable screens. Choose furniture built for outdoor exposure, but provide weather-resistant storage for cushions, toys, tools, and grill accessories.
Use warm, low-voltage lighting along steps and paths, and add task lighting near cooking or dining areas. Keep controls, transformers, outlets, and service points accessible so replacing a fixture or adjusting a timer does not become an unnecessary project.
8. Create a Practical Budget and Project Plan
Separate the plan into must-haves, useful upgrades, and decorative extras. Budget first for grading, drainage, utility work, base preparation, and durable installation. Then account for plants, irrigation, lighting, furniture, storage, permits, and the future cost of cleaning, pruning, sealing, or repair.
A phased plan can make a larger project manageable. Begin with drainage and a functional patio, then add planting, shade, lighting, and furnishings as the budget allows. This approach keeps essential work from being delayed by optional details.
9. Avoid Common Planning Mistakes
- Ignoring drainage until construction is complete.
- Choosing plants without considering mature height and width.
- Using too many materials and small planting beds.
- Blocking maintenance routes with furniture or features.
- Skipping storage and leaving items exposed year-round.
- Focusing on appearance without considering cleaning and repair.
10. Use a Simple Maintenance Checklist
Monthly Tasks
- Clear leaves from drains, paths, and hard surfaces.
- Check irrigation equipment for leaks or clogged emitters.
- Inspect steps, railings, pavers, and deck boards.
- Clean cooking, dining, and seating areas.
Seasonal Tasks
- Prune plants at the appropriate time for each species.
- Refresh mulch without piling it against trunks or stems.
- Store cushions before severe weather.
- Adjust irrigation for seasonal rainfall and temperatures.
Conclusion
A low-maintenance outdoor living space is the result of practical choices made early. When layout, materials, plants, water management, lighting, and storage work together, the yard becomes easier to care for and more enjoyable to use. The best design is not the one with the most features. It is the one that fits the household, respects the site, and continues to function well for years.