How to Prepare Your Property Before Painting
Key Takeaways
- Surface preparation has a major effect on how smooth and durable a paint job looks.
- Cleaning, repairs, sanding, and primer should be matched to the surface and its condition.
- Moisture, peeling paint, gaps, and damaged materials should be corrected before painting.
- Interior and exterior projects require different planning for protection, drying, and weather.
- A final inspection helps catch small flaws before they become lasting distractions.
Why Paint Preparation Deserves More Attention
A new color can refresh a room, improve curb appeal, and make a property feel better maintained. However, the visible finish is only as reliable as the surface beneath it. Experienced residential painters know that preparation is not an optional step before painting. It is the work that helps paint apply evenly, adhere properly, and look consistent after it dries.
Painting over dust, grease, loose coatings, damp spots, or rough repairs can lead to uneven coverage, peeling, bubbling, and visible patch marks. Taking time to inspect and correct those conditions before opening a paint can often prevents more complicated touch-ups later.
Start With a Careful Property Inspection
Inspect the entire project area before selecting paint, colors, or supplies. Look closely at walls, ceilings, trim, siding, doors, and window areas for loose or chalky paint, stains, cracks, dents, mildew, soft wood, and gaps around joints. A small issue can be easier to address before it is covered by a fresh coat.
Water stains deserve particular attention. Paint may hide the discoloration temporarily, but it will not correct an active leak, condensation issue, or drainage problem. Find and fix the source of moisture first, then allow the material to dry fully before repairing and painting. In homes built before 1978, sanding or disturbing older coatings can create lead dust, so follow lead-safe work practices for renovation and painting projects when they apply.
Build a Room-by-Room Interior Checklist
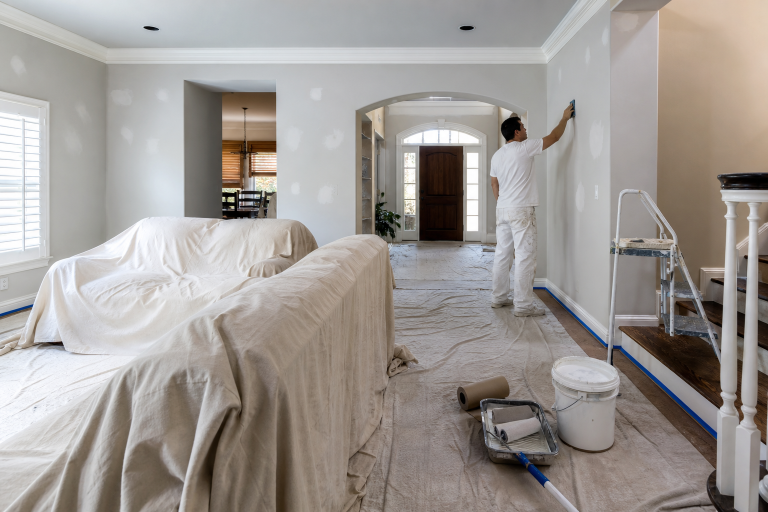
Interior preparation is easier when each room follows the same practical sequence. Start by removing wall décor, small furnishings, outlet covers where appropriate, and fragile items. Move larger furniture away from the walls, then protect floors and fixed furnishings with drop cloths or plastic sheeting.
- Wash walls to remove dust, grease, fingerprints, and residue.
- Fill nail holes, dents, and small cracks with a suitable patching material.
- Sand patched areas and rough edges until they blend with the surrounding surface.
- Remove sanding dust with a clean cloth or vacuum attachment.
- Prime bare drywall, stains, repaired sections, or other areas that need a uniform base.
- Apply painter’s tape only to clean, dry, dust-free edges.
Kitchens, bathrooms, hallways, and children’s rooms often need extra cleaning because they experience more moisture, contact, or regular washing. A wall can look clean from across the room while still holding cooking residue or hand oils that interfere with a smooth finish.
Prepare Exterior Surfaces for Real-World Weather
Exterior paint must handle sunlight, rain, wind, temperature changes, airborne dirt, and biological growth. Begin by checking the forecast and choosing a period that gives surfaces time to dry before and after painting. Trim vegetation away from siding and trim so the work area is accessible and leaves do not rub against fresh paint.
- Wash away dirt, mildew, cobwebs, and loose debris.
- Scrape failing paint and feather rough edges with sanding.
- Repair damaged wood, siding, masonry, trim, or fasteners.
- Caulk appropriate gaps around trim, windows, doors, and joints.
- Prime exposed, bare, or repaired areas with a compatible product.
- Confirm that every surface is dry before applying paint.
Preparation should match the material. Wood may need repair and spot priming after scraping. Metal may need rust removal and a suitable primer. Masonry can require a coating designed for porous surfaces. Vinyl, previously painted siding, and glossy trim may need different cleaning and adhesion steps, so always check the paint and primer labels before beginning.
Know When Priming Makes Sense
Primer is not necessary for every repaint, but it is useful when the surface is bare, porous, stained, heavily patched, glossy, or changing dramatically in color. It can help create a more consistent base for the finish coat and reduce the chance that repaired spots show through differently.
Common situations that call for extra attention include new drywall, bare wood, water or smoke stains, large patching areas, exposed surfaces after scraping, and strong color changes. Use a specialty stain-blocking, bonding, or exterior primer when the surface condition calls for it, rather than assuming one general-purpose product fits every job.
Choose a Finish Based on Use, Not Just Appearance
Paint sheen affects how a surface reflects light, how easy it is to clean, and how noticeable minor imperfections may be. Flat paint offers low shine and can help minimize the appearance of surface texture. Eggshell provides a soft finish with more washability for many living areas. Satin is often practical for frequently used rooms, while semi-gloss is commonly chosen for trim, doors, kitchens, and bathrooms.
Glossier finishes can be durable and easier to wipe clean, but they tend to reveal dents, brush marks, and uneven repairs. Before choosing a sheen, consider how the room is used, how often the surface will be cleaned, and whether the wall is smooth enough for a reflective finish.
Plan Around Drying Time and Weather
Rushing between coats can leave paint vulnerable to dragging, uneven texture, or poor coverage. Follow the product label for drying and recoating times, and account for temperature, humidity, direct sunlight, airflow, rain, and overnight dew. Exterior conditions can change during the day, so check more than a single morning forecast.
For interior work, reasonable ventilation can help manage odors and drying conditions. Avoid creating strong airflow that carries dust onto wet walls or trim. Keep the work area protected until the paint has dried according to the manufacturer’s instructions.
Common Preparation Mistakes to Avoid
- Painting over dusty, greasy, or damp surfaces.
- Skipping small repairs that become more visible under fresh paint.
- Leaving loose paint in place and hoping a new coat will hold it down.
- Using the same cleaner, primer, and process on every material.
- Applying overly thick coats to hide uneven coverage.
- Choosing a sheen without considering the room’s traffic and maintenance needs.
For example, a patched wall may feel smooth to the touch but still have a raised edge. A darker color or a glossier finish can make that edge stand out in changing light. Sanding wider around the repair, removing dust, and priming the patch can produce a more blended result.
When to Handle the Work and When to Ask for Help
A small room with limited repairs may be a manageable do-it-yourself project for a careful property owner. Professional help may be worthwhile for high ceilings, difficult access, extensive peeling, persistent moisture concerns, detailed trim, cabinet finishes, large exterior areas, or commercial spaces that need work completed on a strict schedule.
Before hiring a painting contractor, ask what preparation is included, which products will be used, how long the project is expected to take, and how the work area will be protected and cleaned. A clear scope helps set expectations before painting begins.
A Simple Final Inspection Checklist
- Confirm that each coat has dried for the recommended time.
- Check color consistency in natural and artificial light.
- Look for drips, missed spots, roller marks, and rough edges.
- Make sure repairs blend smoothly into nearby surfaces.
- Inspect trim lines, windows, fixtures, floors, and hardware for splatter.
- Label and safely store leftover paint for future touch-ups.
Conclusion
A durable paint finish starts well before the first brush stroke. Careful inspection, cleaning, repairs, appropriate primer, realistic drying time, and a final walkthrough can make the finished project look cleaner and last longer.